How to Use Sibetter Silicone Rubber to Make Mould by Brushing Way
Generally, there are two ways to make the silicone rubber moulds. Now we are going to introduce you how to use Sibetter silicone rubber to make the moulds by brushing way, which is better to copy the detailed patterns with less silicone rubber.
Operation
Step 1 Handle the original mould
Choose a perfect original mold, manually polish and smooth the model, clean the surface and dry it.
Step 2 Clay & mold-line
Choose a right parting mold-line, nomally the mould can be made into two pieces and also can be multi-piecces for complex products. Then it is better for us to draw the moulded line on the model.
Note: position the mould line on the top of the model when drawing, and run around the face and eyes of the animal model as much as possible.
Put the fixed model on flat wooden board, then cover one part of mold line with clay, an the other part is in the exposed. Coating a layer of mould release agent on the exposed part.
Step 3 Reclaiming
Weight Sibetter Silicone Part A&Part B according to the mixing ratio recommended
Note: generally, the mixiong ratio of the condensation cure silicone is 100:3, and that of platinum cure silicone is 1:1 or 10:1.
Step 4 Stirring evenly
Mix and stir part A and part B evenly, otherwise the silicone rubber will be partly solidified and we don’t get a nice silicone mold. Even if we got the finished mold, the demould times or the shelf life of the mold would be impacted.
Step 5 Vacuum pumping
After mixing evenly, put the mixture into the vacuum machine to release the air bubbles for 3~5mins. Then pour the mixed silicone rubber into the square frame from a corner, making the silicone rubber fill into the frame smoothly.
In this step, don’t vacuum the mixture too long, saying over ten minutes, otherwise it will cause cross linking reaction then cured, and no more further steps will be available.
Generally, the less the bubble is, the better the performance of the mold would be. But It is also ok if no vacuum machine. We can release the bubbles by longer the operation time or use a brush to deal with it.
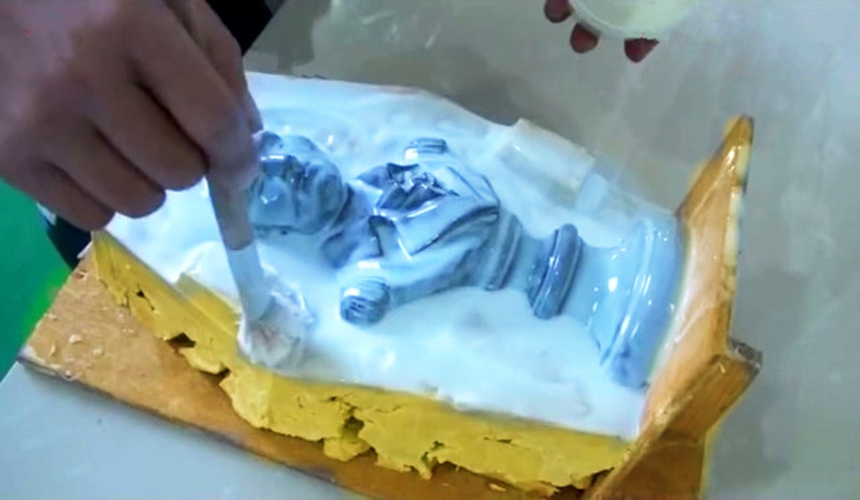
Step 6 Brush the first layer
Evenly brush the first layer of mixed Sibetter silicone rubber on the model. Normally, the first layer is brushed thinly to cover the model and the clay, so it can copy the patterns clearly.
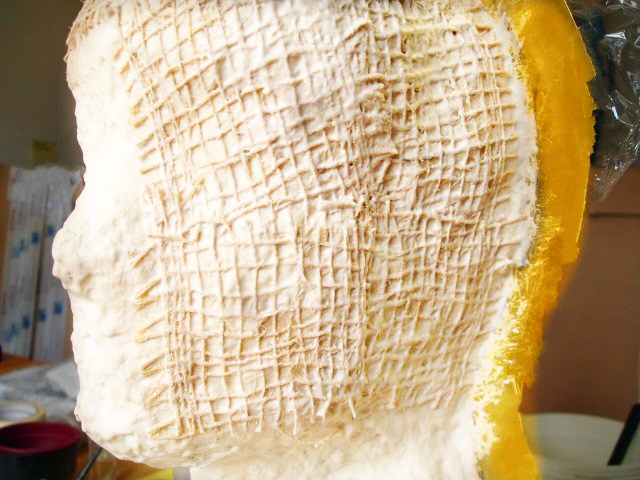
Step 7 Brush the second layer and put the fibreglass cloth
Brush the second layer of silicone rubber till the first on is cured. Normally, the second layer should be 3~5mm. Cover a gauze or cloth on it when the second cross linkind reaction goes on, and use a brush pen or a brush to avoid any interstices. Evenly brush the third layer of mixed Sibetter Silicone on the gauze or cloth.
This step will help longer the moulds using age, tear-trength, tension trength and duplication times.
Step 8 Outer molding to protect the silicone rubber mould
Way 1: make a square frame with four pieces of wooden boards, and make sure the wooden board are fixed firmly, then pout the mixed liquid plaster into the frame. Shave the plaster-made ourer mould with a scarper when the plaster is going to cured.
Way 2: brushing resin on the surface after silicone mold, cover a gauze or cloth on it. Then brushing the resin again. Repeat this operation for 2~3 tims.
Also, the other way to make moulds is brushing way. Then what’s the difference?
Pouring way
Advantages: easy-operation, suit for the product with smooth surface, no mold-line
Disadvantage: with a lot of silicone rubber
Brushing way
Advantages: saving silicone rubber, copy the detail pattern clear
Disadvantage: with a lot of time, complicate operation, difficult to learn


